We are very excited to announce that the Grovecrest art program has a new art curriculum this year!
(Parent volunteers can go here to access the new curriculum. However, we have had some technical problems with this blog, so if you can't access the new blog, you should have had the lessons for your grades emailed to you).
New lessons have been written specifically for each grade that follow the state core standards and objectives for visual art. As in years past, we will rely on our wonderful parent volunteers to teach these lessons to the students.
Kindergarten and first grade students will be creating projects inspired by popular children's picture books.
Second - fifth grade will be studying great artists throughout history and various art styles. They will create projects that will enhance their drawing, painting and creative skills.
Sixth grade students will study specific elements, such as perspective, illusion, architecture, color value, etc.
The art room has also had a make over! You will find all new supplies, large art posters, and children's picture books that go along with each lesson.
We are also looking forward to a special Arts Extravaganza night next spring, where each child will have artwork on display for the school and community to enjoy, as well as special performances from the school choir, ballroom dance team, and musical groups. With all these exciting improvements, we can't wait to see the amazing creations our students will come up with this year!
Thanks so much for your support. Please let me know if you have any questions or concerns.
Leslie Stinson
grovecrestart@gmail.com

Ideas and resources for Grovecrest Elementary art volunteers.
Thursday, September 27, 2012

Wednesday, September 19, 2012
Harold and the Purple Crayon - K-1 lesson
This is a lesson plan based on the book Harold and The Purple Crayon by Crockett Johnson. The target age for this lesson is kindergarten to first grade. In this lesson, students will learn how to utilize their imagination to create art using basic shapes and minimal color. This lesson plan was written by Misty Ivie.
Context
Name: Misty Ivie Grade Level: K Group
Size: Whole Class
Subject/Topic: Art
Lesson Length: 45
minutes
What
Taught
Teaching Objective: Students will explore shapes and
how they influence art.
Standard:
Major Concepts: shapes, imagination
How
Evaluated
Behavioral Objective
(ABCD objective): Students will use five
shapes to create an imaginative artwork.
How
Taught (Direct Instruction)
State Management
Expectations!
Good listening. Eyes on me.
Anticipatory Set: 15min
Start at rug. Read Harold and the Purple Crayon. (while reading, have students draw in the air with their "purple crayon" the shapes Harold is drawing).
Discuss imagination (like looking at clouds).
Use large circles, squares, and triangles to imagine what else they could be.
Objective: Create
imaginative artwork using the color purple and shapes.
Instruction:
10min
* Input - Real Artists use their imagination to create pictures from shapes. Using my imagination what could I add to this shape to create something else? *Repeat with shapes.
*Modeling – Watch how I put glue
around the edge of the shape 2 times and then smooth down the edges. Now let’s
add some detail (press hard with crayon!)Glue large shapes onto large black poster board and create new images based on student suggestions.
*Check for Understanding –Listen to student responses
20min
Guided Practice:
Each of you will have a
bag at your desk with 5 purple shapes in it and a black piece of paper. When you get to your seat, take out the
shapes and see what new shapes you can make using your imagination. Then add detail with your purple crayon.
Students make imaginative shapes on paper.
Walk around and encourage ideas.
Closure: Just like real artists, you used your imagination to create
your artwork today.
Management
Expectations:
I expect good listening.
Eyes on me.
Don’t use scissors.
Only use purple crayons.
Procedures: Shapes are precut and sorted into individual bags. Crayons are handed out at desks.
Fast finisher:
When you finish tell a friend at your table
about what you imagined on your artwork.
Resources
Harold and The Purple Crayon
Black Construction Paper
Purple Paper Shapes in 23 baggies
Purple Crayons
Purple Glitter Glue
Black foam core board with large purple shapes
Large glue stick
Wednesday, May 2, 2012
End of year party.
I thought I would re post this party from our last day of art last year. Even if you don't have time for a full lesson, it is a neat idea to have a little "graduation" and present them with an official artist certificate!
I planned a surprise donut party for our last art session. First we created coffee filter flowers, which were a big hit.
As the projects were drying I called each student up, one-by-one and presented them with a very official looking graduation certificate from Mrs. Stinson's art class (and we all cheered as each student came to the front of the class to accept their certificate).

You can print these free certificates here and fill them out with your own name and the names of your students.
We enjoyed our Krispy Kremes and talked about all the projects we created throughout the year. Then Miss Cook and the class surprised me with a gift!

This is a neat book about a student who doesn't think she can draw, but her teacher inspires her. I will definitely be using this book in a lesson to come this year.
I planned a surprise donut party for our last art session. First we created coffee filter flowers, which were a big hit.
As the projects were drying I called each student up, one-by-one and presented them with a very official looking graduation certificate from Mrs. Stinson's art class (and we all cheered as each student came to the front of the class to accept their certificate).

You can print these free certificates here and fill them out with your own name and the names of your students.
We enjoyed our Krispy Kremes and talked about all the projects we created throughout the year. Then Miss Cook and the class surprised me with a gift!

(My son, Camden and I with a few class mates.)
They gave me the book, The Dot by Peter H. Reynolds, and each student signed the inside cover.
So sweet!
I think anything you can do to make each child feel special goes a long way in the memory of a child. Thanks Miss Cook and her 2nd grade class for a great year!
Monday, March 19, 2012
Colorful Etching
I remember doing this project in a Jr. High art class. The results are stunning and I was so excited to share it with my class this last week.
Age group: Any
Supplies:
White paper,
crayons,
black ACRYLIC paint (not the tempera-the acrylic covers better and dries faster)
foam brushes,
dish soap,
scratch tools like toothpicks or pop cycle sticks.
Start with a white piece of paper (I used regular computer paper), and have the students color hard and dark with crayons until the complete sheet is covered. The brighter colors: the better the results. I kept reminding the students not to leave any white spots.


Age group: Any
Supplies:
White paper,
crayons,
black ACRYLIC paint (not the tempera-the acrylic covers better and dries faster)
foam brushes,
dish soap,
scratch tools like toothpicks or pop cycle sticks.
Start with a white piece of paper (I used regular computer paper), and have the students color hard and dark with crayons until the complete sheet is covered. The brighter colors: the better the results. I kept reminding the students not to leave any white spots.

This is the first step, half way finished.
After their 2nd grade arms were ready to fall off from coloring, we painted over the entire page with black tempura paint mixed with just a drop or two of dish soap. (The dish soap helps the paint to adhere to the waxy crayon).
I didn't take a picture, but at this point, their projects should be completely black. The paint will take about 20 minutes to dry. To pass the time, you could read a picture book about space to the students, you could let them free draw, or come up with another idea. (Maybe play some Star Wars music in the background). Also, you could bring a couple of blow dryers, set on low heat, and lightly blow the pictures to help them dry.
Now for the magic! Use the tooth pics to "etch" out the black paint and make drawings of space so the color shows through.
Now for the magic! Use the tooth pics to "etch" out the black paint and make drawings of space so the color shows through.

It would also be fun to draw spring flowers or jungle scenes. Really, anything is going to look awesome with this project.
(Note* if you don't want to use paint, you can also go over the entire project with black crayon. You have to push pretty hard, but the etching will work the same way).
Let me know if you have any questions.
Monday, February 6, 2012
Tissue Paper Hearts
This is a classic project you might remember doing when you were in grade school.
Age Group: K-3
Supplies Needed:
* Tissue paper in varying colors, cut in about 2" x 2" squares.
(*Note* there is white tissue paper in the art supply room but you will need to provide the other colors yourself).
* Desired shape cut out in construction paper or card stock (I used hearts for this one. You could use shamrocks in March, eggs in April, etc.)
* Glue
* Pencils
We talked about the color wheel: primary colors, warm and cool colors. (You can check out a big color wheel poster from the school library for a great visual). I showed them a few paintings from the library collection and we discussed how warm colors make you feel as compared to how cool colors. Next, we decided that since we see a lot of red and pink around Valentine's Day, we would do our hearts in "warm colors."
To begin the project, take one small square of tissue paper, wrap it around the eraser side of a pencil, dip it the glue, and stick to the construction paper. Repeat, repeat, repeat! This project turns out so pretty, but it took longer than I thought. My second graders worked for almost an hour to finish.

Age Group: K-3
Supplies Needed:
* Tissue paper in varying colors, cut in about 2" x 2" squares.
(*Note* there is white tissue paper in the art supply room but you will need to provide the other colors yourself).
* Desired shape cut out in construction paper or card stock (I used hearts for this one. You could use shamrocks in March, eggs in April, etc.)
* Glue
* Pencils
We talked about the color wheel: primary colors, warm and cool colors. (You can check out a big color wheel poster from the school library for a great visual). I showed them a few paintings from the library collection and we discussed how warm colors make you feel as compared to how cool colors. Next, we decided that since we see a lot of red and pink around Valentine's Day, we would do our hearts in "warm colors."
To begin the project, take one small square of tissue paper, wrap it around the eraser side of a pencil, dip it the glue, and stick to the construction paper. Repeat, repeat, repeat! This project turns out so pretty, but it took longer than I thought. My second graders worked for almost an hour to finish.

New Supplies in!
Just letting you know we have new watercolor paints and new watercolor paper available in the art supply room! Let me know if there is any other supplies you need.
Shaded Heart
I haven't tried this Valentine project, but it looks like it would be a fun one for older grades. I found it here at Art Projects For Kids. Here instructions are easy to follow.
Supplies:
White construction paper
Oil pastels
Ruler
Supplies:
White construction paper
Oil pastels
Ruler
Sunday, January 22, 2012
Winter Cityscape
Supplies:
White or grey construction paper
White oil pastel
Pencil
Blue water color
Paintbrush
I love cityscapes and this project turned out to be really fun. I got the idea from this book (which was one of my favorite Christmas presents this year... that and the awesome art calendar I got from my third grader in Mrs. Guerrero's class. They worked hard on a lot of great art projects).
First, I talked to the class about reflections: where they see them, how they are made, and asked if they have ever seen reflections on a lake or river.
Next, we took a sheet of white construction paper, positioned it horizontally, folded it in half to get a long horizontal crease line in the middle of the paper. We unfolded the paper and drew a thick solid line right on that crease to establish our horizon line. (The horizon line represents where the sky meets the flat earth).
Then we drew a simple cityscape of rectangles and squares rising from the horizon line. (Ask the students to push firmly on the oil pastels to get a good, waxy drawing). We talked about depth and perception and how it looks more realistic to draw the buildings almost as if they were growing out of each other rather than each individually.
*Note, if we'd had grey paper, it would have been easier. The white oil pastel on white paper was a little hard to see. I will work on getting some grey paper in our supply.
After they had drawn buildings, they added stars, a moon, windows in the buildings, and other details.
Next, we folded the paper in half again, and rubbed the back side of the paper with a pencil. They need to rub hard to get the drawing to transfer to the bottom half of the paper. When you open the paper, the drawing should have lightly transferred to the bottom half.
Then, paint the top half of the paper with a dark blue watercolor. The pastel will resist the paint. Next, paint the lower half of the drawing with a lighter blue.


The "resist" reflection showed up better on some than others, but they were still pleased with the outcome.
White or grey construction paper
White oil pastel
Pencil
Blue water color
Paintbrush
I love cityscapes and this project turned out to be really fun. I got the idea from this book (which was one of my favorite Christmas presents this year... that and the awesome art calendar I got from my third grader in Mrs. Guerrero's class. They worked hard on a lot of great art projects).
First, I talked to the class about reflections: where they see them, how they are made, and asked if they have ever seen reflections on a lake or river.
Next, we took a sheet of white construction paper, positioned it horizontally, folded it in half to get a long horizontal crease line in the middle of the paper. We unfolded the paper and drew a thick solid line right on that crease to establish our horizon line. (The horizon line represents where the sky meets the flat earth).
Then we drew a simple cityscape of rectangles and squares rising from the horizon line. (Ask the students to push firmly on the oil pastels to get a good, waxy drawing). We talked about depth and perception and how it looks more realistic to draw the buildings almost as if they were growing out of each other rather than each individually.
*Note, if we'd had grey paper, it would have been easier. The white oil pastel on white paper was a little hard to see. I will work on getting some grey paper in our supply.
After they had drawn buildings, they added stars, a moon, windows in the buildings, and other details.
Next, we folded the paper in half again, and rubbed the back side of the paper with a pencil. They need to rub hard to get the drawing to transfer to the bottom half of the paper. When you open the paper, the drawing should have lightly transferred to the bottom half.
Then, paint the top half of the paper with a dark blue watercolor. The pastel will resist the paint. Next, paint the lower half of the drawing with a lighter blue.


The "resist" reflection showed up better on some than others, but they were still pleased with the outcome.
Monday, January 9, 2012
Salt Dough Sculpture
I'm on a snowman kick this week... this is a fun project for grades K-2. The night before the lesson I made salt dough with this easy recipe. I gave each child a ball and let them play with it while we talked about and looked at pictures of sculpture. (You can check out The Art Book from the school library for examples).
Then, we made simple snowmen by rolling out three balls: small, medium, and large and stacking them on top of each other. I gave each child a handful of cookie sprinkles to use for eyes and nose, and two toothpicks to use for arms. (note* I purchased these myself. We don't have these in the art supply room).
We left the snowmen in the classroom over the weekend so they could dry out and then the kids took them home the next week.
This is not a great picture, and the poor guy has last an arm, but this is the one my now 2nd grader made back in kindergarten.

Then, we made simple snowmen by rolling out three balls: small, medium, and large and stacking them on top of each other. I gave each child a handful of cookie sprinkles to use for eyes and nose, and two toothpicks to use for arms. (note* I purchased these myself. We don't have these in the art supply room).
We left the snowmen in the classroom over the weekend so they could dry out and then the kids took them home the next week.
This is not a great picture, and the poor guy has last an arm, but this is the one my now 2nd grader made back in kindergarten.

The kids loved sculpting. You could make different shapes or ornaments as well.
Winter Landscape
Since the weather was a balmy 5 degrees when it was time for school to begin today... I decided to go with a snowman theme for our lesson this week. I got this idea from Deep Space Sparkle. (You've got to check out this blog. She has so many great ideas with easy instructions. At the top there is an "art lessons" tab with lessons organized by grade level, or if you scroll down the home page, on the bottom right there is a "category column" where the lessons are organized by seasons, themes, etc.)
We are going to do the Easy Winter Landscape lesson this week.

I'm going to incorporate this book Snowmen At Night. Have you read it? It has awesome illustrations.

I had the kids look at the trees in this book closely. We also looked at the trees outside the classroom window and noticed their shape and color, especially the colors of the trees up close (more dark) and the colors of those in the distance (less dark).
Next, we started with our blue sheet of paper and drew a light pencil line horizontally through the middle of the sheet. Then we painted the entire lower portion white. I had mixed a light grey color before we started for each student combining white and a small drop of grey paint. We used this light grey color first and painted two trees starting from the base of the white line. Then we used the regular grey paint for two trees, starting in the middle of the white "snow." Last, we painted two black trees starting about an inch from the bottom of the sheet. The varying distances makes the perspective look great. Last, we painted a little snowman.


I think this lesson could be used for any age. The older grades could add more details although I wish we'd had more narrow paintbrushes. It was hard to make thin branches.
Monday, January 2, 2012
Pointilist Snowmen
This is an easy project for younger grades with a unique approach: dot painting (similar to pointillism) using q-tips.

When I taught this to first graders last year, we talked about the artist Georges Seurat and I showed them An Afternoon at La Grande Jatte, (you can check this out from the school library, PIC 198).

We talked about pointillism and looked closely at how the brush strokes differ from other kinds of painting. The kids were very excited to try their hand at this. We started with dark blue construction paper. They were instructed to draw three circles: large on bottom, medium in the middle and small on top. Next we dipped q-tips in white tempera paint and filled the circles with dots. When the paint was dry, they used crayons to draw hats, scarfs, eyes, boots, and background details.
Here is a close up of the "dot painting."

*Note* we don't have q-tips in the art supply room, so you would have to provide them yourself. Luckily they are cheap!


We talked about pointillism and looked closely at how the brush strokes differ from other kinds of painting. The kids were very excited to try their hand at this. We started with dark blue construction paper. They were instructed to draw three circles: large on bottom, medium in the middle and small on top. Next we dipped q-tips in white tempera paint and filled the circles with dots. When the paint was dry, they used crayons to draw hats, scarfs, eyes, boots, and background details.
Here is a close up of the "dot painting."
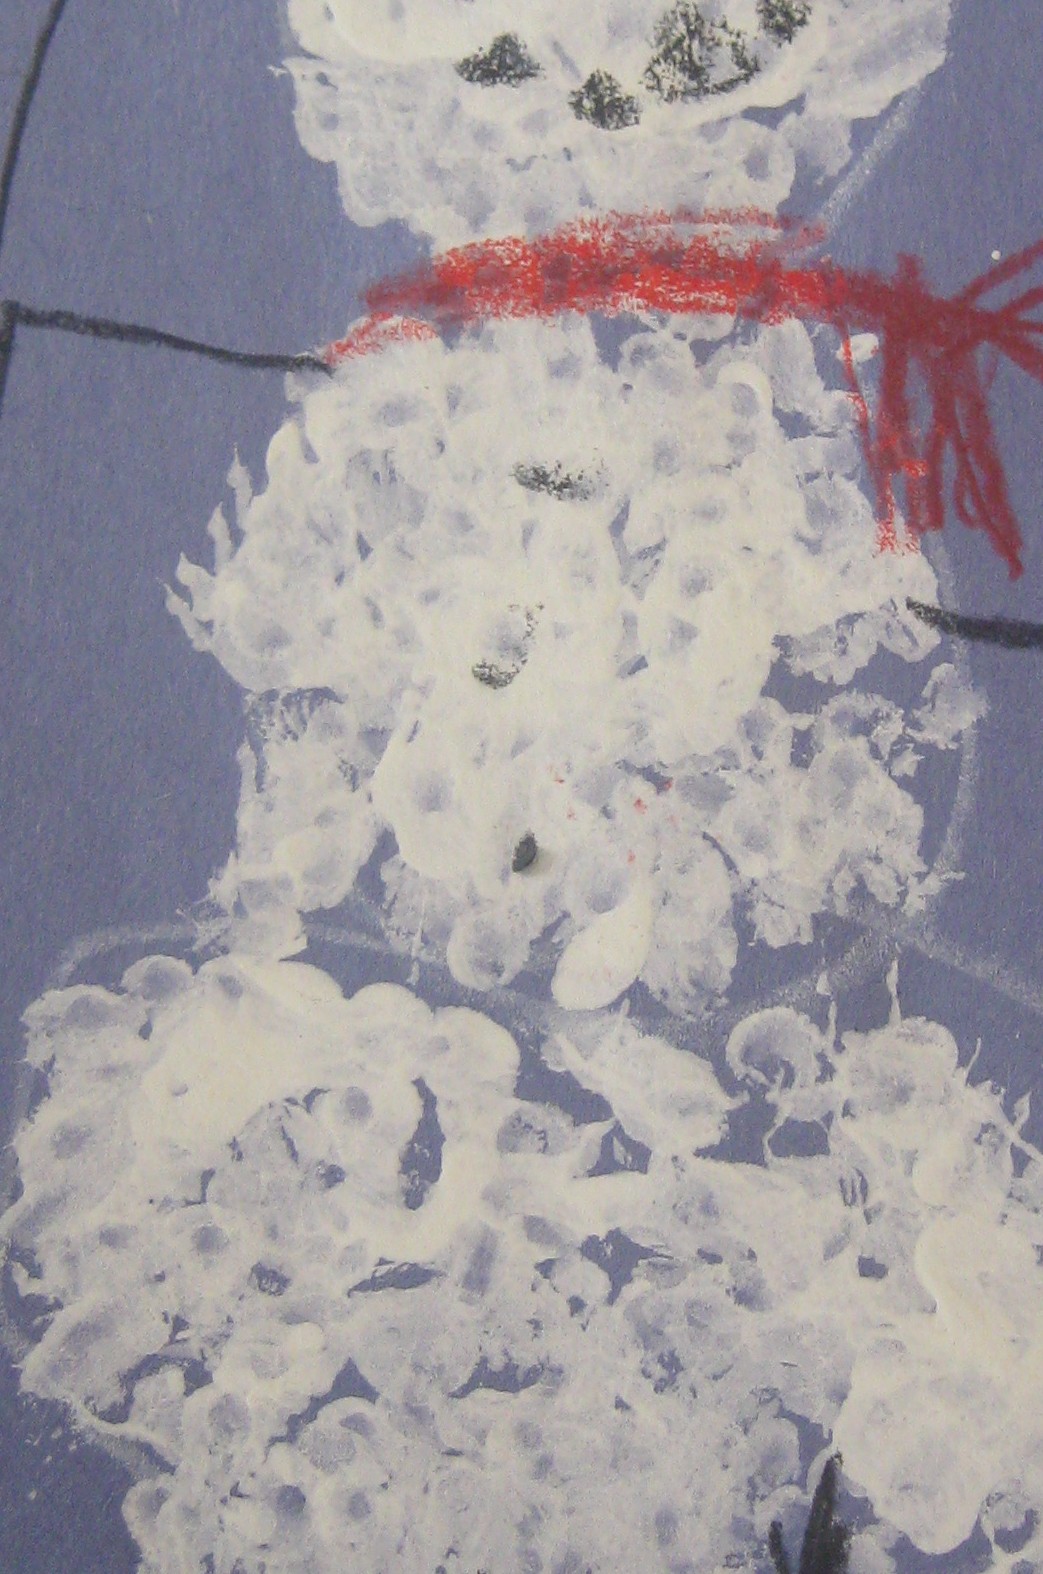
*Note* we don't have q-tips in the art supply room, so you would have to provide them yourself. Luckily they are cheap!
Tuesday, December 6, 2011
Nutcracker Series
This was a two-week project and the kids loved how it turned out. I used this sketch from Art Projects for Kids and walked the kids through step by step directions of how to draw a nutcracker. I used regular computer paper (8 1/2" x 11") cut in half length wise. They drew the nutcracker on both pieces of paper (thus, a series). Next, they outlined their drawings with thin, black sharpies. This is as far as we got on the first lesson.
Week two: We used watercolors for one of the nutcrackers and oil pastels on the second. Then we pasted them on black cardstock because everything looks better when it is framed in black, right? (I also tried drawing the nutcracker on black cardstock -with white colored pencil, and then colored in with pastels on the black paper. It looked really nice).
The kids were so excited to take these home.


Week two: We used watercolors for one of the nutcrackers and oil pastels on the second. Then we pasted them on black cardstock because everything looks better when it is framed in black, right? (I also tried drawing the nutcracker on black cardstock -with white colored pencil, and then colored in with pastels on the black paper. It looked really nice).
The kids were so excited to take these home.


Tuesday, November 15, 2011
Fall leaf collage
Supplies:
White Paper
Watercolors
Construction paper: red, yellow, orange, brown
Scissors
Glue

I got this project idea from the Art Projects for Kids website. (I love this website!) Tomorrow we will be doing this with kindergartners and Friday with third graders.
First, we will talk about collages and different kinds of things you could use to make a collage. Next, we will paint a simple blue on top and green on bottom background. While that dries, the older kids will cut out leaves. (I am going to use colored construction paper rather than have them use watercolors for the leaves so we can finish it in one class period).
For the kindergartners, I have precut the tree shape and leaf shapes. We don't have as long of a lesson time with them, and I didn't want to run out of time.
Then we will glue it all together. I will post pictures of their results later this week!
White Paper
Watercolors
Construction paper: red, yellow, orange, brown
Scissors
Glue

I got this project idea from the Art Projects for Kids website. (I love this website!) Tomorrow we will be doing this with kindergartners and Friday with third graders.
First, we will talk about collages and different kinds of things you could use to make a collage. Next, we will paint a simple blue on top and green on bottom background. While that dries, the older kids will cut out leaves. (I am going to use colored construction paper rather than have them use watercolors for the leaves so we can finish it in one class period).
For the kindergartners, I have precut the tree shape and leaf shapes. We don't have as long of a lesson time with them, and I didn't want to run out of time.
Then we will glue it all together. I will post pictures of their results later this week!
Tuesday, November 8, 2011
Silouette Landscape
Supplies:
Water colors
White Paper
Black Paper
Glue
Scissors
I recently saw these awesome sunset pictures hanging outside of Mr. Nelson's classroom. Art volunteer, Meg Powell did these with his class, and I love them! I found a similar lesson with instructions here.


(She also wrote Goodnight Gorilla, 10 Minutes till Bedtime, Office Buckle and Gloria.)


For our lesson last week with Mrs. Guerrero's class, I first read this book to the class and told them to play close attention to the illustrations. Then we made our own landscape silouette pictures.
First, we painted the sunset with watercolors on white paper. Since this was the week before Halloween, I had them stick to orange, purple, yellow and red to look more spookey. However, this would be a really fun project any time of the year. Rather than use spookey cutouts, you could do regular houses and trees.
While the watercolors were drying, I showed them how to draw some basic tree, moon, stars, gravestones, and bat shapes. They practiced on scratch paper. Then they drew their shapes on black paper with white crayon. Next, they cut out the shapes. Then we glued them on top of the watercolor when it was dry.
The results are really cool and somehow I accidently deleted all the pictures I took but this one! (Argh!)
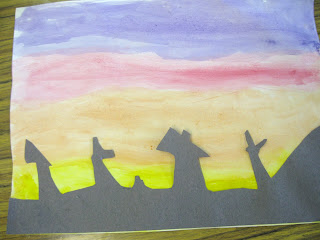
Water colors
White Paper
Black Paper
Glue
Scissors
I recently saw these awesome sunset pictures hanging outside of Mr. Nelson's classroom. Art volunteer, Meg Powell did these with his class, and I love them! I found a similar lesson with instructions here.

It reminded me of the illustrations in one of my kid's favorite books, The Day the Babies Crawled Away by Peggy Rathman.


(She also wrote Goodnight Gorilla, 10 Minutes till Bedtime, Office Buckle and Gloria.)
For our lesson last week with Mrs. Guerrero's class, I first read this book to the class and told them to play close attention to the illustrations. Then we made our own landscape silouette pictures.
First, we painted the sunset with watercolors on white paper. Since this was the week before Halloween, I had them stick to orange, purple, yellow and red to look more spookey. However, this would be a really fun project any time of the year. Rather than use spookey cutouts, you could do regular houses and trees.
While the watercolors were drying, I showed them how to draw some basic tree, moon, stars, gravestones, and bat shapes. They practiced on scratch paper. Then they drew their shapes on black paper with white crayon. Next, they cut out the shapes. Then we glued them on top of the watercolor when it was dry.
The results are really cool and somehow I accidently deleted all the pictures I took but this one! (Argh!)

Wednesday, October 26, 2011
Primary and Secondary Colors
I did this one again today with the kindergartners, and they loved it. It doesn't take much to excite them. They think the milk experiment is pure magic!
For younger grades, start by reading the book Little Blue and Little Yellow by Leo Lionni to the class. (The Grovecrest Library has a copy of it.)

This is a cute little tale of two colors and the mischief they cause resulting in them becoming a new color!
Next up: color changing experiment. First, set up three clear glasses of milk on a table. Add a drop of RED liquid food coloring in one, BLUE in another, and YELLOW in the third.
Then explain secondary colors are formed by mixing two primary colors together. Add a drop of yellow food coloring into the already made red milk (making ORANGE); a drop of blue food coloring into the already made yellow milk (making GREEN); and a drop of red food coloring into the already made blue milk (making PURPLE).

If you have more ideas for color wheel lessons, please share with us!
For younger grades, start by reading the book Little Blue and Little Yellow by Leo Lionni to the class. (The Grovecrest Library has a copy of it.)

Next up: color changing experiment. First, set up three clear glasses of milk on a table. Add a drop of RED liquid food coloring in one, BLUE in another, and YELLOW in the third.
Then explain secondary colors are formed by mixing two primary colors together. Add a drop of yellow food coloring into the already made red milk (making ORANGE); a drop of blue food coloring into the already made yellow milk (making GREEN); and a drop of red food coloring into the already made blue milk (making PURPLE).

At this point, the last time I did this, the kids wanted to see what all the colors mixed would make...which was a lovely shade of brown.
Click here for a video of the above experiment.
To end the lesson, I hand out this handout of the color wheel and let them paint in the correct colors.
If you are teaching older grades, this lesson from Hotchalk looks fun. Also, I just found this experiment I'm dying to try.
If you have more ideas for color wheel lessons, please share with us!
Friday, October 14, 2011
Joan Miro Drawing
Supplies:
Blue paper
Black Sharpie pens
oil pastels
Today, the third graders learned about the artist Joan Miro and looked at his painting,
People at Night, Guided by Phosphorescent Tracks of Snails

First, I walked around the classroom showing each child the painting above (you could print this online. This print is not available in the library). We talked about what they saw in the painting. First they made comments like, "Nothing. Scribbles." But then as they looked closer they saw, "a moon, spiderwebs, a face, shapes, etc."
Then we talked about surreal art and how it looks to create something not realistic. Next, we talked about Joan Miro and I shared a few facts from his life, including that he has works of art dating back to when he was 8 years old. (The kids thought that was pretty cool).
As we started, I told them they would get to have a lot of creativity on this project, but one rule is, once they start drawing (with a black sharpie), they couldn't take their pen off the page until they filled the whole sheet with lines, squiggles, designs, and doodles. If they felt like they made a mistake, I told them to just make it into a design. After they filled the paper with the initial black lines, then they could go back in with the pastels or black marker and add details like eyes, teeth, coloring in shapes, etc.
This was an easy project and a great one to start the year with as we discussed how everyone creates different art, and it doesn't matter how one person's looks compared to another. Art is art no matter what other people think of it. (A great comparison is Miro's above to the Mona Lisa and point out how different they look, and yet they are both famous works of art).


I think this lesson boosts confidence in their ability to make something look great and they had a lot of fun with it. (I got this idea from the Usborne book My Very First Art Book).
Blue paper
Black Sharpie pens
oil pastels
Today, the third graders learned about the artist Joan Miro and looked at his painting,
People at Night, Guided by Phosphorescent Tracks of Snails

First, I walked around the classroom showing each child the painting above (you could print this online. This print is not available in the library). We talked about what they saw in the painting. First they made comments like, "Nothing. Scribbles." But then as they looked closer they saw, "a moon, spiderwebs, a face, shapes, etc."
Then we talked about surreal art and how it looks to create something not realistic. Next, we talked about Joan Miro and I shared a few facts from his life, including that he has works of art dating back to when he was 8 years old. (The kids thought that was pretty cool).
As we started, I told them they would get to have a lot of creativity on this project, but one rule is, once they start drawing (with a black sharpie), they couldn't take their pen off the page until they filled the whole sheet with lines, squiggles, designs, and doodles. If they felt like they made a mistake, I told them to just make it into a design. After they filled the paper with the initial black lines, then they could go back in with the pastels or black marker and add details like eyes, teeth, coloring in shapes, etc.
This was an easy project and a great one to start the year with as we discussed how everyone creates different art, and it doesn't matter how one person's looks compared to another. Art is art no matter what other people think of it. (A great comparison is Miro's above to the Mona Lisa and point out how different they look, and yet they are both famous works of art).


I think this lesson boosts confidence in their ability to make something look great and they had a lot of fun with it. (I got this idea from the Usborne book My Very First Art Book).
Wednesday, September 28, 2011
New Art Volunteers!
Thanks to those of you who made it to the meeting yesterday. It was fun to meet some of you and share ideas. Just a reminder about supplies: there will be new oil pastels, water color paper, construction paper, and tempera paint by the end of this week.
Please let me know if you'd like to share a post here or if you have any questions or concerns. Good luck on a new year with our young artists!
Please let me know if you'd like to share a post here or if you have any questions or concerns. Good luck on a new year with our young artists!
Sunday, September 4, 2011
Coffee Filter Watercolor
Age group: K - 2nd
Supplies Needed:
Coffee filters (3-4 per student). These are not available in the art supply room, but quite inexpensive
and one package comes with a couple of hundred filters.
Bright Colored Markers
Scissors, crayons, paper.
Water
Glue
This was our last project of the year on the same day as our party. Since it was one of the last days of school... and a party, we didn't have too much structure and instructions, just a lot of creative fun.
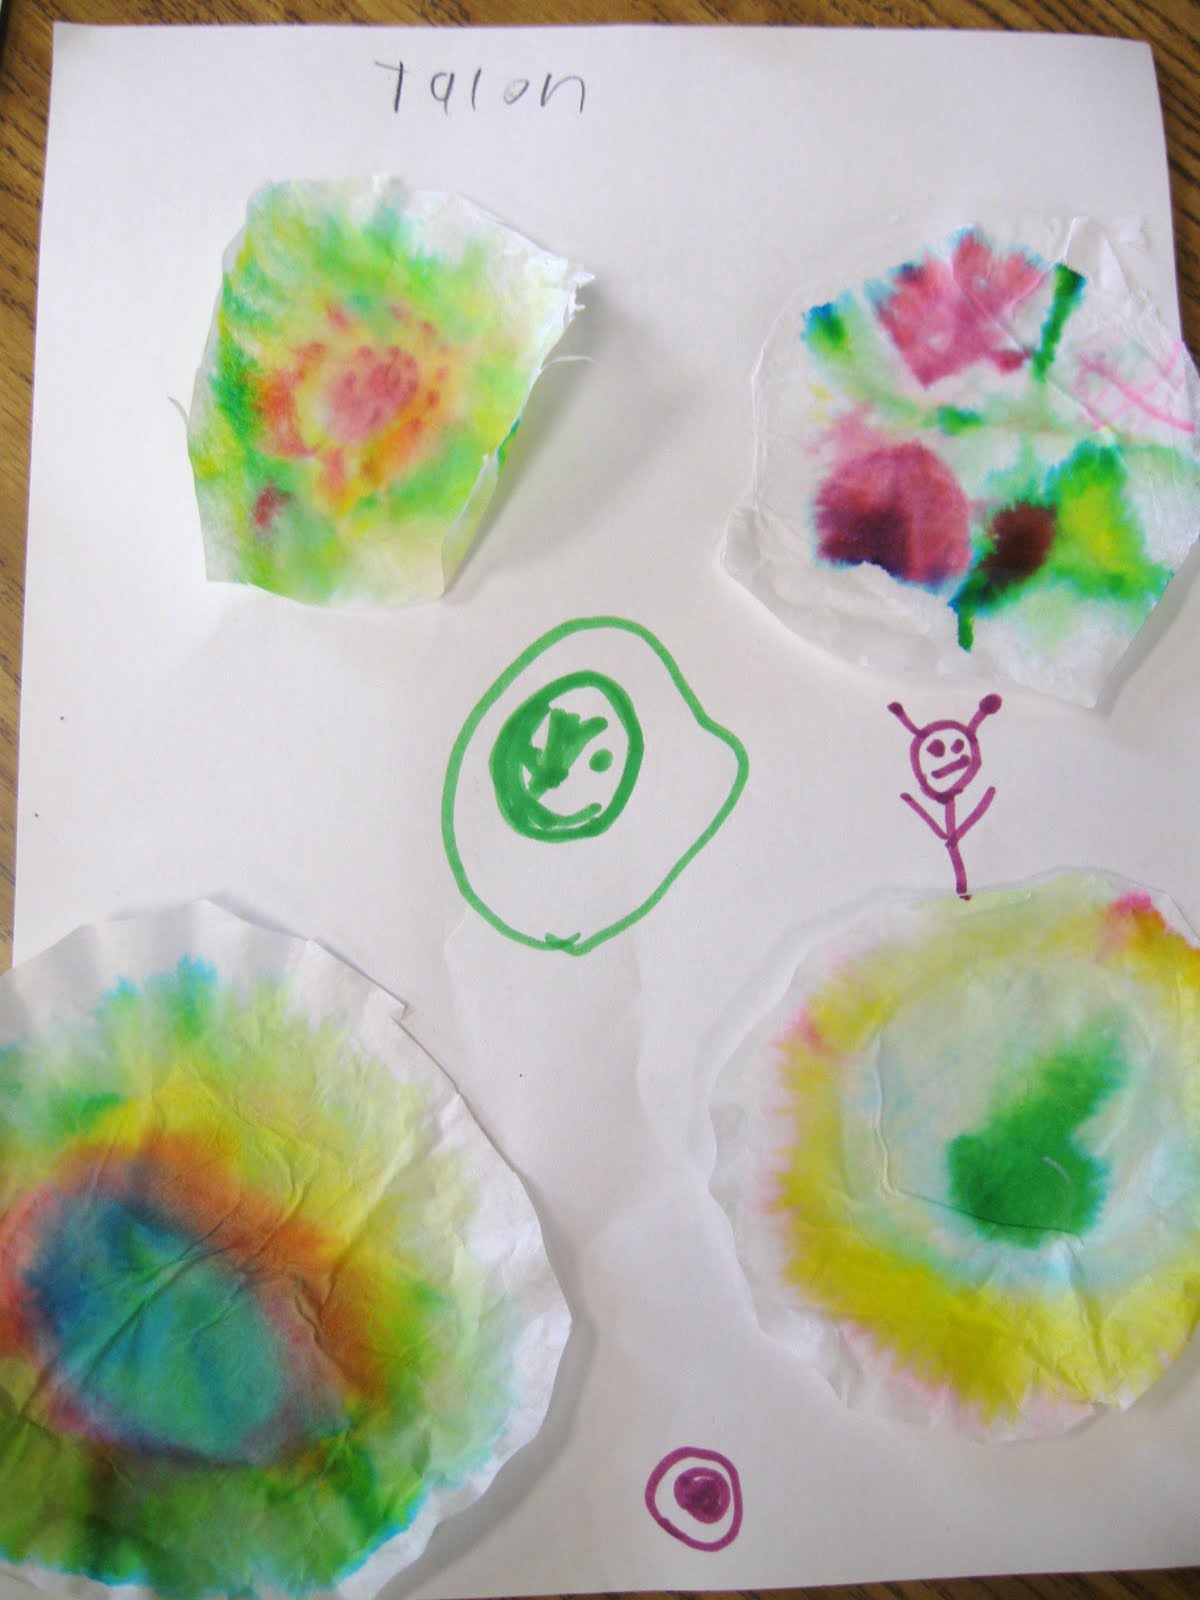
Each student received 3-4 filters and colored them with makers. They could do any designs, making sure to use a lot of color and not leave much white space.
Next, we dripped 2-3 small drops of water on each filter and watched the magic as the colors expand and run together. (We used small droppers that I own. You could also use medicine droppers, or just have the students dip their finger in a cup of water and sprinkle the water on the filters, but make sure to only get 2-3 drops. If you get to much, the filter will become so wet it may tear).
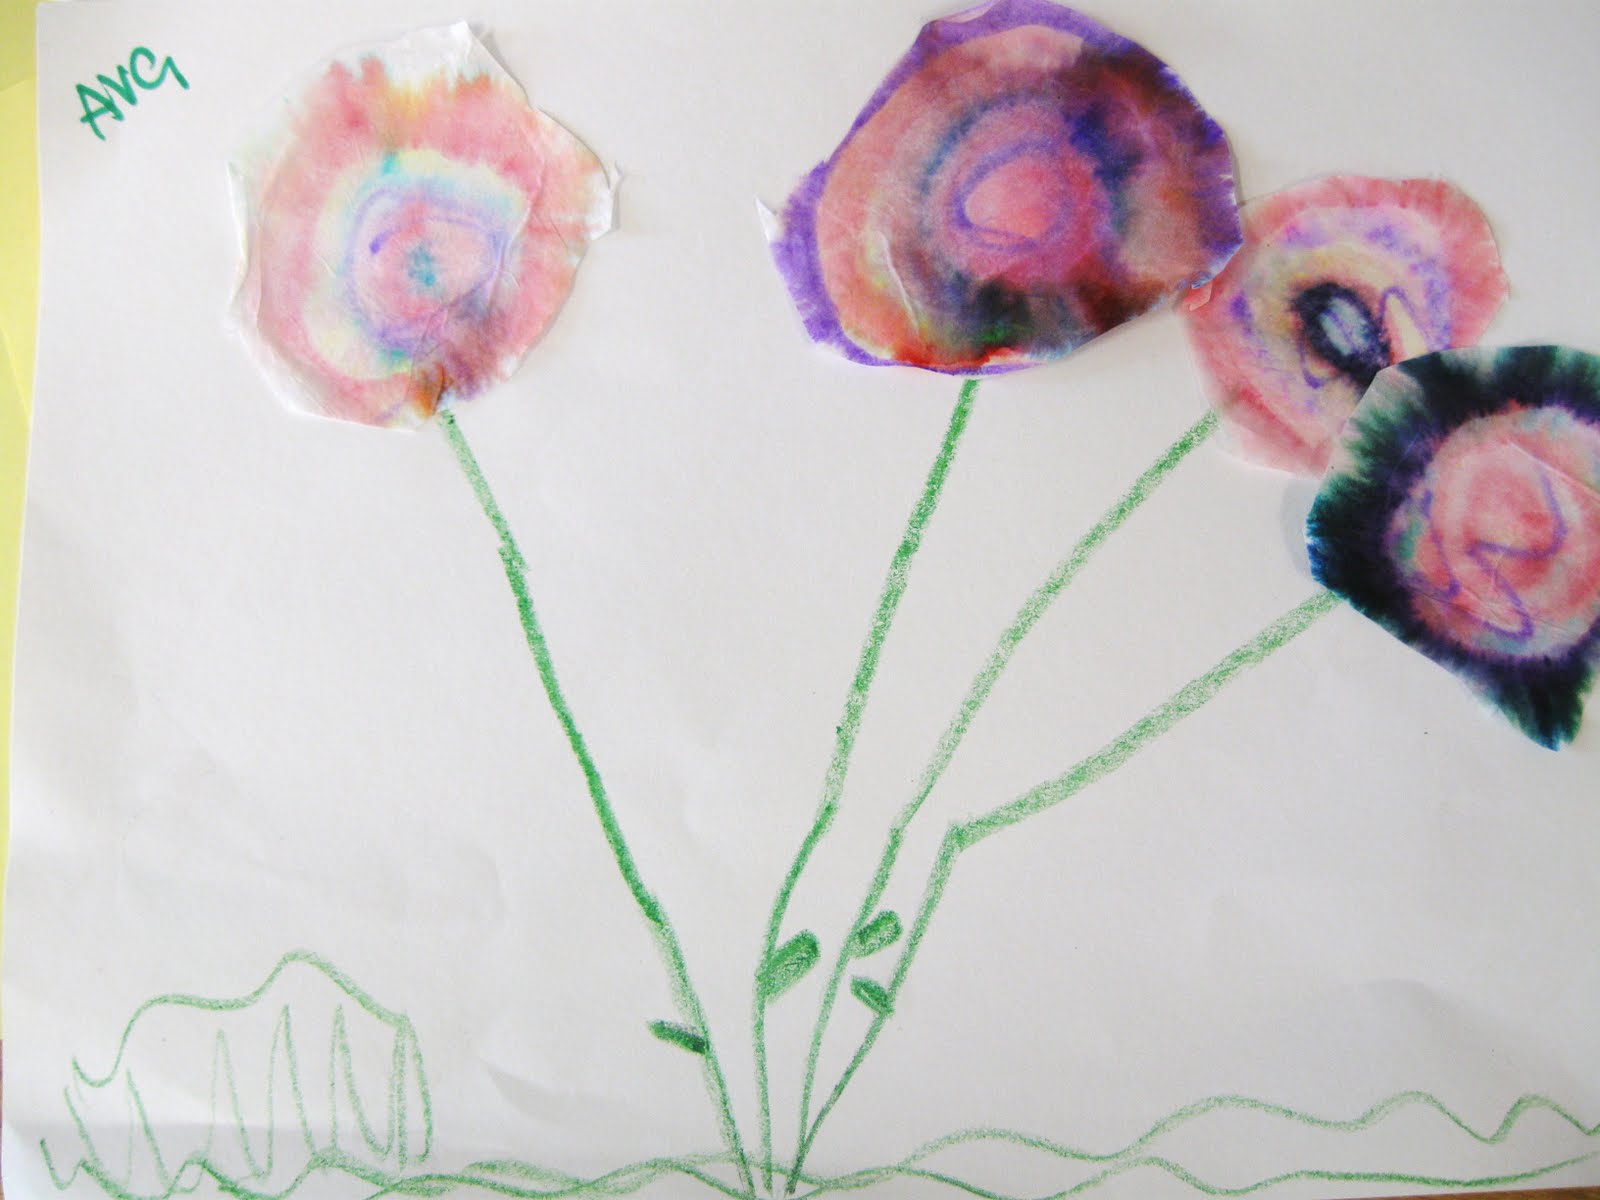
After they dried for 5-10 minutes, the student's cut their filters into shapes, glued them to a background sheet, and colored details on the paper. They turned out quite nice.


Supplies Needed:
Coffee filters (3-4 per student). These are not available in the art supply room, but quite inexpensive
and one package comes with a couple of hundred filters.
Bright Colored Markers
Scissors, crayons, paper.
Water
Glue
This was our last project of the year on the same day as our party. Since it was one of the last days of school... and a party, we didn't have too much structure and instructions, just a lot of creative fun.
Each student received 3-4 filters and colored them with makers. They could do any designs, making sure to use a lot of color and not leave much white space.
Next, we dripped 2-3 small drops of water on each filter and watched the magic as the colors expand and run together. (We used small droppers that I own. You could also use medicine droppers, or just have the students dip their finger in a cup of water and sprinkle the water on the filters, but make sure to only get 2-3 drops. If you get to much, the filter will become so wet it may tear).
After they dried for 5-10 minutes, the student's cut their filters into shapes, glued them to a background sheet, and colored details on the paper. They turned out quite nice.




Monday, August 29, 2011
Flower vase/Still life
So... in getting ready for the new school year, I realized there are a few projects from last year that I never posted! Here we go:
Age Group: 1st grade and up
Supplies Needed:
White paper (any size will work, but I like to use larger than 8 1/2 x 11 on this project).
Tempera paint
Watercolors
To begin this project, we first looked at famous works of art including flower vases.


(The above works of art can be found in The Art Book, which is available for check out from Mrs. De St. Jeor in the Grovecrest Library.)
Next, the students folded their white sheets of paper in half vertically, pressed a crease to get a horizon line, and then unfolded the paper. (The crease is still visible and helps them to judge where to draw things). We then drew a line across the lower half of the paper to represent the table. Next came a simple vase drawing using a pencil. Then they could add flowers and designs in the vase with tempera paint. This was the end of our first session.
The next time we met, they completed flower details and painted designs in the table cloth with tempera paint, and then painted the background with watercolors. The finished projects are so unique and colorful.
(Of course they would look a lot better if I ever remember to bring my real camera instead of the camera on my phone which isn't great as you can tell.)


I love this one above. He wanted to be different so he painted roses. Awesome.


The painting above was created by a first grader from a class I taught last year. You can see how the same concepts can be taught to different grade levels. Their interpretation will grow each year!
Age Group: 1st grade and up
Supplies Needed:
White paper (any size will work, but I like to use larger than 8 1/2 x 11 on this project).
Tempera paint
Watercolors
To begin this project, we first looked at famous works of art including flower vases.
Van Gogh, Sunflowers
Pablo Picasso, Hand with Flowers
(The above works of art can be found in The Art Book, which is available for check out from Mrs. De St. Jeor in the Grovecrest Library.)
Next, the students folded their white sheets of paper in half vertically, pressed a crease to get a horizon line, and then unfolded the paper. (The crease is still visible and helps them to judge where to draw things). We then drew a line across the lower half of the paper to represent the table. Next came a simple vase drawing using a pencil. Then they could add flowers and designs in the vase with tempera paint. This was the end of our first session.
The next time we met, they completed flower details and painted designs in the table cloth with tempera paint, and then painted the background with watercolors. The finished projects are so unique and colorful.
(Of course they would look a lot better if I ever remember to bring my real camera instead of the camera on my phone which isn't great as you can tell.)


I love this one above. He wanted to be different so he painted roses. Awesome.


The painting above was created by a first grader from a class I taught last year. You can see how the same concepts can be taught to different grade levels. Their interpretation will grow each year!
If you have any questions, please let me know grovecrestart@gmail.com
Monday, March 28, 2011
Eric Carle Artwork
Chances are, you've seen some of Eric Carle's books and artwork.


The Very Hungry Caterpillar is our family's favorite.
Age: K-3
Supplies: tissue paper, glue, background paper, crayon
This project idea was inspired by Eric Carle's illustrations made from tissue paper. When we did this last year, the first grade students were very excited to be making caterpillars just as the author did.
For younger grades, I would precut the circle head and ovals for the body so as not to take the entire class time cutting. Then, paint regular glue on the back of the shapes and glue them to a white sheet of paper. We also did a very thin coat of glue on top of the caterpillar as well. When dried, it has a really pretty, stain-glass look. Last, the students can use crayons or colored pencils to add "hairs" and facial details.

The circles at the bottom imitate the inside cover art of the book.

*Note* You will need to provide the tissue paper for this project. There is only white available in the art supply room. I bought a large package like this with a 40% off coupon at JoAnn Fabric for $6 and have used it for many projects.
Subscribe to:
Posts (Atom)