Supplies:
White Paper
Watercolors
Construction paper: red, yellow, orange, brown
Scissors
Glue
I got this project idea from the Art Projects for Kids website. (I love this website!) Tomorrow we will be doing this with kindergartners and Friday with third graders.
First, we will talk about collages and different kinds of things you could use to make a collage. Next, we will paint a simple blue on top and green on bottom background. While that dries, the older kids will cut out leaves. (I am going to use colored construction paper rather than have them use watercolors for the leaves so we can finish it in one class period).
For the kindergartners, I have precut the tree shape and leaf shapes. We don't have as long of a lesson time with them, and I didn't want to run out of time.
Then we will glue it all together. I will post pictures of their results later this week!
Showing posts with label fall. Show all posts
Showing posts with label fall. Show all posts
Tuesday, November 15, 2011
Tuesday, November 8, 2011
Silouette Landscape
Supplies:
Water colors
White Paper
Black Paper
Glue
Scissors
I recently saw these awesome sunset pictures hanging outside of Mr. Nelson's classroom. Art volunteer, Meg Powell did these with his class, and I love them! I found a similar lesson with instructions here.
(She also wrote Goodnight Gorilla, 10 Minutes till Bedtime, Office Buckle and Gloria.)
For our lesson last week with Mrs. Guerrero's class, I first read this book to the class and told them to play close attention to the illustrations. Then we made our own landscape silouette pictures.
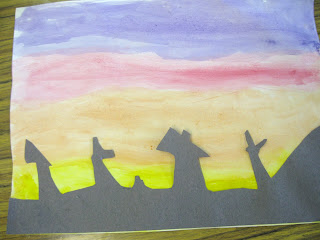
First, we painted the sunset with watercolors on white paper. Since this was the week before Halloween, I had them stick to orange, purple, yellow and red to look more spookey. However, this would be a really fun project any time of the year. Rather than use spookey cutouts, you could do regular houses and trees.
While the watercolors were drying, I showed them how to draw some basic tree, moon, stars, gravestones, and bat shapes. They practiced on scratch paper. Then they drew their shapes on black paper with white crayon. Next, they cut out the shapes. Then we glued them on top of the watercolor when it was dry.
The results are really cool and somehow I accidently deleted all the pictures I took but this one! (Argh!)
Water colors
White Paper
Black Paper
Glue
Scissors
I recently saw these awesome sunset pictures hanging outside of Mr. Nelson's classroom. Art volunteer, Meg Powell did these with his class, and I love them! I found a similar lesson with instructions here.
It reminded me of the illustrations in one of my kid's favorite books, The Day the Babies Crawled Away by Peggy Rathman.
(She also wrote Goodnight Gorilla, 10 Minutes till Bedtime, Office Buckle and Gloria.)
For our lesson last week with Mrs. Guerrero's class, I first read this book to the class and told them to play close attention to the illustrations. Then we made our own landscape silouette pictures.
First, we painted the sunset with watercolors on white paper. Since this was the week before Halloween, I had them stick to orange, purple, yellow and red to look more spookey. However, this would be a really fun project any time of the year. Rather than use spookey cutouts, you could do regular houses and trees.
While the watercolors were drying, I showed them how to draw some basic tree, moon, stars, gravestones, and bat shapes. They practiced on scratch paper. Then they drew their shapes on black paper with white crayon. Next, they cut out the shapes. Then we glued them on top of the watercolor when it was dry.
The results are really cool and somehow I accidently deleted all the pictures I took but this one! (Argh!)
Sunday, November 7, 2010
Fall Leaf Line Drawing
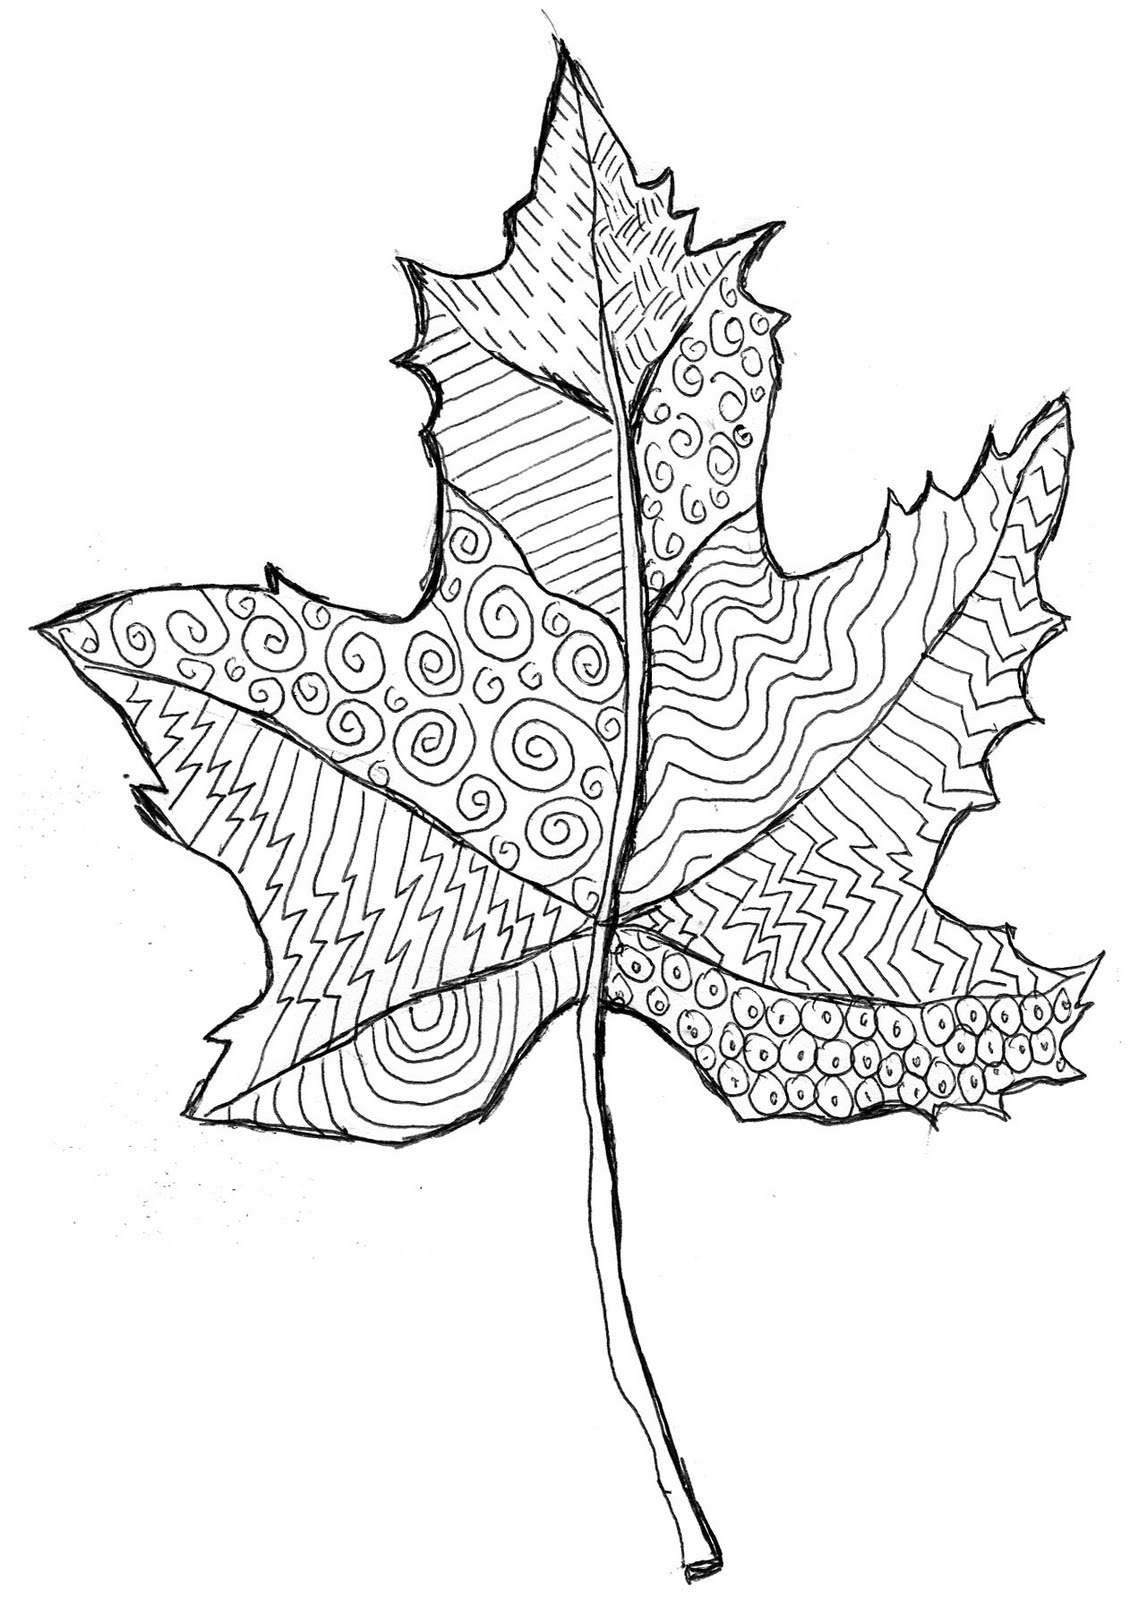
This was an easy project (in terms of supplies and messiness factor), and the finished project looks pretty neat. The inspiration came from my favorite art blog again, Art Projects for Kids. Her instructions are here.

First, I gathered a bunch of leaves from the backyard and brought them with me to the classroom so each student could examine one for inspiration. As we looked at our individual leaves we talked about the colors, and all the tiny details in the stems and veins that they might not have noticed before. They were amazed at all the tiny details.
Next I passed out a white sheet of paper with a lightly drawn leaf on it. I used the blog author's finished project as a template. (You could draw your own leaf, try enlarging a leaf clip art, or click on my image below twice to enlarge it, copy and paste it to Word and print it from there). It is fine if the drawing is very light.
Can you tell which one is mine, and which one is my son's? The kids enjoyed coming up with their own ideas for patterns. When we were finished, some wanted to color in their leaf so we used warm colored pencils.

First, I gathered a bunch of leaves from the backyard and brought them with me to the classroom so each student could examine one for inspiration. As we looked at our individual leaves we talked about the colors, and all the tiny details in the stems and veins that they might not have noticed before. They were amazed at all the tiny details.
Next I passed out a white sheet of paper with a lightly drawn leaf on it. I used the blog author's finished project as a template. (You could draw your own leaf, try enlarging a leaf clip art, or click on my image below twice to enlarge it, copy and paste it to Word and print it from there). It is fine if the drawing is very light.
Next, the kids used a medium point black Sharpie to outline the leaf and a fine point sharpie to outline the veins and stem. (In the art supply room there is a box of both types of markers). Then we talked about fine lines and patterns and a I drew a few examples on the white board. They filled in each section of the leaf with a different pattern.
This was an easy project that you could use for any age group.
Saturday, October 23, 2010
Howling Houses Lesson
Yesterday I got to teach Miss Cook's 2nd grade class. We did a lesson called "Howling Houses" that I found on the Arts and Activities website. (I recently found this website and it is awesome. They offer full lesson plans with lots of fun ideas). You could adapt this lesson for any age group.
As our lesson began, I played a scary music CD in the background. The music was a big hit with the kids. They would have thought anything was cool at this point. Then we looked at pictures of haunted houses and talked about the colors used and the mood they create.
Walter Wick's On a Scary Scary Night is a great place to start. We also looked at paintings by the artist Charles Burchfield.
(I printed these from the internet)
The prints below would also be great visual aids on this topic and are available in the Grovecrest Library:
El Greco's View of Toledo
Van Gogh's Starry Night
As we discussed mood, we also talked about cool vs. warm colors and how they affect the way you feel. I asked the students to tell me how the paintings make them feel, what elements specifically create these feelings, and what details they would expect to see in a haunted house (cracked roofs, jagged edges, moon, stars, bare trees, etc.)
You could use many different mediums for this project. I choose oil pastels against black paper but colored pencils, paint, or even crayons would work well. I steered the students away from blood and ghosts, and tried to focus on just the house. I also asked them to stay within cool colors for their palette.
They loved the outcome.
I would love to hear what lessons you are using and how they are going. If you'd like to share them with us, please email us at grovecrestart@gmail.com
Sunday, October 3, 2010
Scary Ideas!
It is only the first week of October, but I'm already excited for Halloween art projects, and you can bet the kids will be too! This link has lots of great Halloween ideas from Art Projects for Kids.
I wanted to try this one last year, but I didn't plan far enough ahead to have two sessions to finish it up in time (instructions here). Maybe we will do it this year.
If you want to do a project that takes more than one lesson to finish, ask the teacher if you can come back the next week or give the teacher instructions on finishing the project.
Have your teachers contacted you yet to establish a lesson time? If not, you could discuss it at parent teacher conference this week. Let me know how your first lessons go. I'd love to hear what you are doing.
Monday, September 27, 2010
Fall/Warm colors collage
I haven't actually tried this one myself, but I think it would be fun this time of year.
This idea came from my favorite art idea website: Art Projects for Kids.
The author has full instructions listed there. (You would need to supply the tissue and wax paper for the class). I would like to try tracing and cutting out a leaf design on the collage and then hang it from a window to let the light sine through the colors. You could have a discussion with the class about warm colors and collage techniques.
Subscribe to:
Posts (Atom)


